How to reinstall VMP™ VPN on Windows
In this tutorial, you will learn how to reinstall the VMP™ VPN application on your Windows device.
Reinstall VMP™ VPN on Windows
Follow the steps below to completely remove and freshly reinstall the VMP™ VPN application on your Windows device.
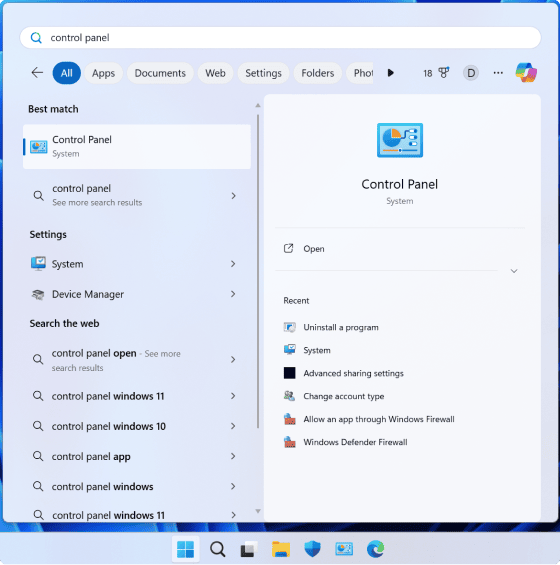
Step 1: Open Control Panel
Press the Windows key, type "Control Panel", and open it.
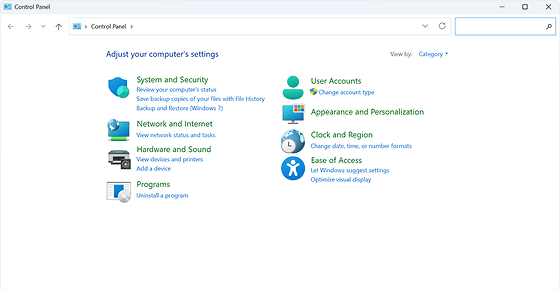
Step 2: Go to Programs and Features
Click "Uninstall a program" under the Programs section. This opens the list of installed applications.
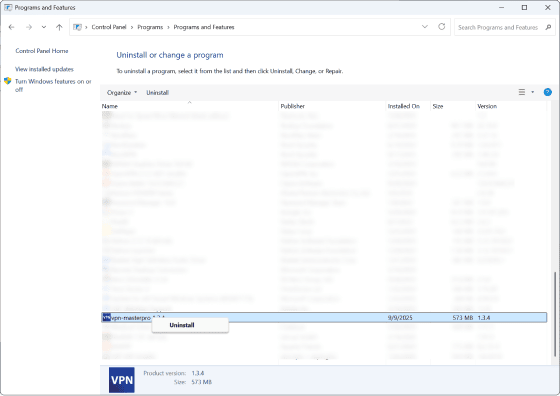
Step 3: Uninstall VMP™ VPN
Find "VMP™ VPN" in the list, right-click it (or select it) and choose "Uninstall" or "Uninstall/Change".
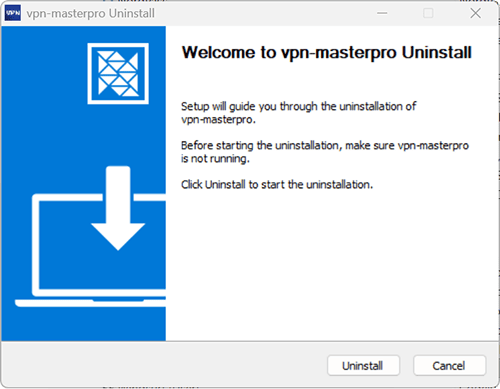
Follow the uninstaller prompts and complete the process.
Step 4: Reboot Your Device
Restart Windows after uninstalling to ensure old services, drivers, and cached components are fully removed.
Step 5: Download the Latest Installer
Go to the official website and download the newest version of the app: VMP™ VPN Download Page
Avoid third-party or unverified sources to prevent corrupted or outdated installers.
Optional: Remove Leftover Files Manually
Only perform this if you are comfortable with Windows file management:
- Press 'Win + R', type '%ProgramFiles%', and press Enter. Delete any remaining VMP™ VPN folder.
- Press 'Win + R', type '%AppData%', and remove leftover related folders if present.
- Open Device Manager and ensure no inactive virtual adapters remain.
Then download and reinstall again.
Step 6: Install the Application
Now follow the article on How to setup VMP™ VPN on Windows for detailed installation instructions.
Need More help?
If you are experiencing issues, please reach out to our support team for assistance.